Imagine sitting at your desk, your Japanese textbooks piled high, and your heart racing. You’ve spent months mastering kanji and listening to podcasts, and finally, it is time. The Japanese-Language Proficiency Test (JLPT) is the gold standard for proving your skills, whether you want to study in Tokyo or land a job at a global tech firm. but there is one gatekeeper you must meet first: MyJLPT.
The MyJLPT portal is the official heart of the exam process. From the moment you decide to take the test to the day you nervously check your scores, this platform is your best friend. In this comprehensive MyJLPT Guide, we will walk through every step—registering for an ID, applying for the exam, and managing your lifelong records—so you can focus on your studies instead of technical glitches.
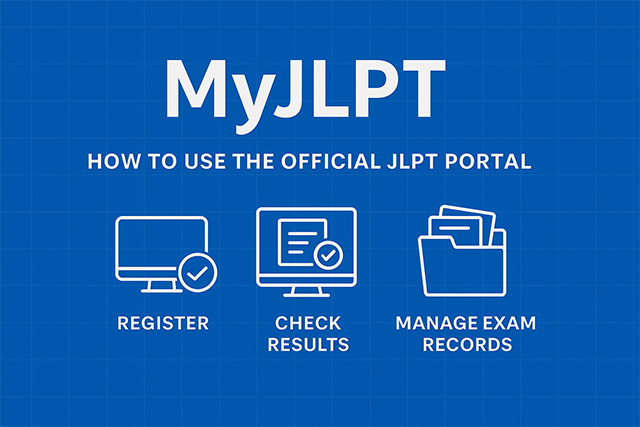
The Importance of the MyJLPT Portal
If you are serious about your Japanese journey, the MyJLPT system is not just a “nice to have”—it is a necessity. For students in Japan, it is the only way to apply online. For those overseas, while some local host institutions use their own sites, having a MyJLPT ID often allows you to view results faster and request official certificates for employment or visa applications.
The problem many face is the website’s interface. It can feel a bit dated and intimidating, especially if you are still getting used to Japanese web layouts. Missing a deadline or filling out a form incorrectly can result in a six-month wait for the next testing cycle. That is why a clear roadmap is essential for success.
Step 1: How to Register for a MyJLPT ID
Before you can apply for an exam, you need a “MyJLPT ID.” Think of this as your permanent digital passport for the JLPT. You only need to do this once in your life.
Creating Your Account
Visit the Official Site: Go to the JEES JLPT website.
1. Choose “Individual” (個人): Most students register as individuals. If you are a student at a language school, they might register you as a “Group,” but having your own ID gives you more control over your records.
2. Select Your Language: The portal is available in both Japanese and English. Choose the one you are most comfortable with to avoid mistakes.
3. Fill in the Details: You will need to provide your name (exactly as it appears on your passport), nationality, and a valid email address.
4. Verify Your Email: After submitting, you will receive a confirmation email. You must click the link within 24 hours, or your registration will be deleted.
Expert Tip: The Password Rule
Many users get stuck on the password screen. Your password must be between 8 and 16 characters and must include at least one uppercase letter, one lowercase letter, and one number. Write this down immediately; you will need it every time you log in to check your results!
Step 2: Registering for the Exam
Once you have your ID, the actual application happens during specific “Application Periods.” Typically, these are in March–April for the July test and August–September for the December test.
The Application Workflow
Log In: Use your MyJLPT ID and password.
Examination Application: Click the “Examination Application” button on the main dashboard.
Choose Your Level: Select from N5 (easiest) to N1 (most advanced). Be careful here—you cannot change your level once you pay!
Upload Your Photo: The photo must be clear, with a plain background, and look like a passport photo. If the photo is blurry, your application might be rejected.
Payment: In Japan, you can pay via credit card, bank transfer, or at a convenience store (Konbini). If you choose the Konbini option, you must pay within a few days, or your application will be cancelled automatically.
Step 3: Checking Your JLPT Results
The most stressful part of the process is the wait. Results are usually released online about two months after the exam (late August for July and late January for December).
How to See Your Scores
To check your results, log into the MyJLPT portal and click on “Test Result and Certificate Issuance.” You will see a table listing your test date, level, and the most important word: Passed or Failed.
By clicking “For Details,” you can see a breakdown of your scores in Vocabulary, Grammar, Reading, and Listening. This is incredibly helpful for identifying your weaknesses if you plan to take a higher level next time.
Managing Your Records and Certificates
One of the biggest advantages of the MyJLPT system is the ability to manage your history. If you are applying for a job three years after your exam, you can log in to request a “Certificate of Result and Scores.”
Requesting Official Documents
While you get a paper score report in the mail for free, many companies or immigration offices require a formal certificate.
- Fee: There is a fee (usually around 1,000 yen plus shipping).
- Processing Time: It usually takes 1–2 weeks for domestic delivery and longer for international.
- History: The portal stores your last 10 years of test data, making it easy to track your progress from N5 all the way to N1.
Comparison of JLPT Registration Methods
Depending on where you live, the process might look a little different. Here is a quick comparison to help you understand your specific situation.
| Feature | Japan (Domestic) | Overseas (Most Countries) |
| Primary Portal | MyJLPT (JEES) | Local Host Institution Website |
| Registration Fee | Approximately 7,500 Yen | Varies by Country |
| Payment Options | Credit Card, Konbini, Pay-easy | Varies (Credit Card, PayPal, Local Banks) |
| Result Access | Online via MyJLPT (Fastest) | Online via Global JLPT Site / Local Site |
| ID Requirement | Mandatory MyJLPT ID | Often uses email or unique Registration No. |
Real-Life Experience: Avoiding the “Session Timeout”
When I first registered for the N3 level, I waited until the very last day of the application period. The website was so slow because everyone else was trying to register at the same time. I kept getting “Session Timed Out” errors.
According to data from the Japan Foundation, over 1 million people take the JLPT annually. When results are released or deadlines approach, traffic spikes can crash the site. My advice? Always register at least one week before the deadline. This gives you a buffer in case you have issues with your photo upload or payment processing.
Expert Advice for Professionals and Job Seekers
For young professionals, your MyJLPT record is a vital part of your resume. Many Japanese companies will not even look at an application unless you have an N2 or N1 certification.
If you are currently in the middle of a job hunt, don’t wait for the physical certificate to arrive in the mail. You can take a screenshot of your MyJLPT “Test Result” page and include it in your digital application as temporary proof. Just be sure to mention that the official document is on its way.
Final Thoughts: Your Roadmap to Success
The MyJLPT portal might seem like a maze of menus and forms, but it is the key to unlocking your future in Japan. By securing your ID early, double-checking your photo requirements, and keeping your login credentials safe, you remove the stress of administration.
Actionable Summary:
- Register early to get your MyJLPT ID.
- Verify your email within 24 hours of signing up.
- Pay immediately after applying to secure your seat.
- Bookmark the login page so you can check your results the moment they are released.